Hi there! Today I am starting a new series on my channel called Five Ways. In this series I will be showing an overview of a featured product and five basic ways to use it. This series will hopefully help you see if the product is useful to you and help you make the decision if it is right for you.
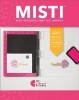
In today’s first installment of the Five Ways series I will be featuring the MISTI. The MISTI has become my favorite stamping tool because it is almost effortless to use and gives me great results every time! Not to mention all of the fun techniques you can do with it!
Enjoy the video!
Getting a complete stamped image:
Getting a complete stamped image is simple using the MISTI. Just line the stamp up on your card stock, press the acrylic door down to pick up the stamp, ink up the stamp, and stamp down your image. If you are using a large image it can be hard to get a full image stamped impression, just ink up the stamp again and press the acrylic door back over the image, it will stamp in the exact same spot giving you a more complete image. (feel free to do this step as many times as needed)
- Stamp set used: Discontinued
Stamping with Distress Inks:
Distress Inks are a technique ink, they are not formulated for getting a complete stamped image. With the MISTI you can use your Distress Inks to get a complete stamped image. Just line the stamp up on your card stock, press the acrylic door down to pick up the stamp, ink up the stamp, and stamp down your image. Ink up your stamp again and press the acrylic door back over the image. You will have to do this 3-5 times to get a perfect stamped image.
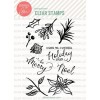
- Stamp set used: Mistletoe And Holly
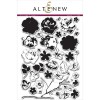
Creating your own background:
Creating your own background using separate stamps is a fun way to get a unique stamped background on your cards. Start out by lining up a scene of stamps onto your card stock, press the acrylic door down to pick up the stamps, ink up the stamps, and stamp down your images. Once again if you made any mistakes you can re-stamp the images.
- Stamp set used: Vintage Flowers
Mass producing cards:
Use all of the steps shown above in the previous techniques. The stamps will stamp in the exact same spot every time. So, you just need to keep replacing the card stock and stamping down your scene. Then you have many fun cards in only a matter of minutes.
- Stamp set used: Vintage Flowers
Using background stamps – fade:
Using background stamps in the MISTI is very easy, especially to get fun techniques like a color fade. Line up your background stamp on the acrylic door, and ink up the background stamp using three different shades of ink, press the acrylic door down onto the card stock and give good pressure to get a complete stamped background fade.
- Stamp set used: Sketched Chevron Background
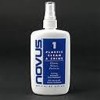
Cleaning:
You can also purchase the Novus Plastic Cleaner to help take off any residual ink on your MISTI. (more info in the video)
SUPPLIES
If you are interested in any of the supplies I used, all of the supplies used in today’s video are linked down below. I am affiliated with Ellen Hutson, so I do get a portion of the profit (with no extra cost to you) this is how I am able to run this blog. Affiliate
links used when possible. I appreciate your support!